You know those treats that instantly transport you back to childhood? For me, it’s Marshmallow Rice Krispies – that magical combination of crispy cereal and gooey marshmallows that always made me feel like I was getting away with eating dessert for breakfast. I still remember standing on a chair in my grandma’s kitchen, watching her stir that bubbling pot of marshmallows like it was some kind of edible alchemy. The best part? This recipe is so simple even a kid could make it (and often does in my house). Just three basic ingredients and about ten minutes stand between you and that perfect mix of crunch and chew that never gets old.
Why You’ll Love These Marshmallow Rice Krispies
Trust me, once you make these, you’ll wonder why you ever bought the pre-packaged version. Here’s what makes them so special:
- Five-minute magic: From stovetop to pan in about the time it takes to find your favorite movie
- Three-ingredient wonder: Butter, marshmallows, cereal – that’s it! No fancy pantry items needed
- Kid-approved: My littles can practically make these themselves (with supervision at the stove, of course)
- Instant nostalgia: That first whiff of melting marshmallows takes me right back to childhood summers
- Endless possibilities: Dress them up or keep them classic – they’re delicious either way
The best part? You probably have everything you need in your kitchen right now. Go ahead – make some memories!
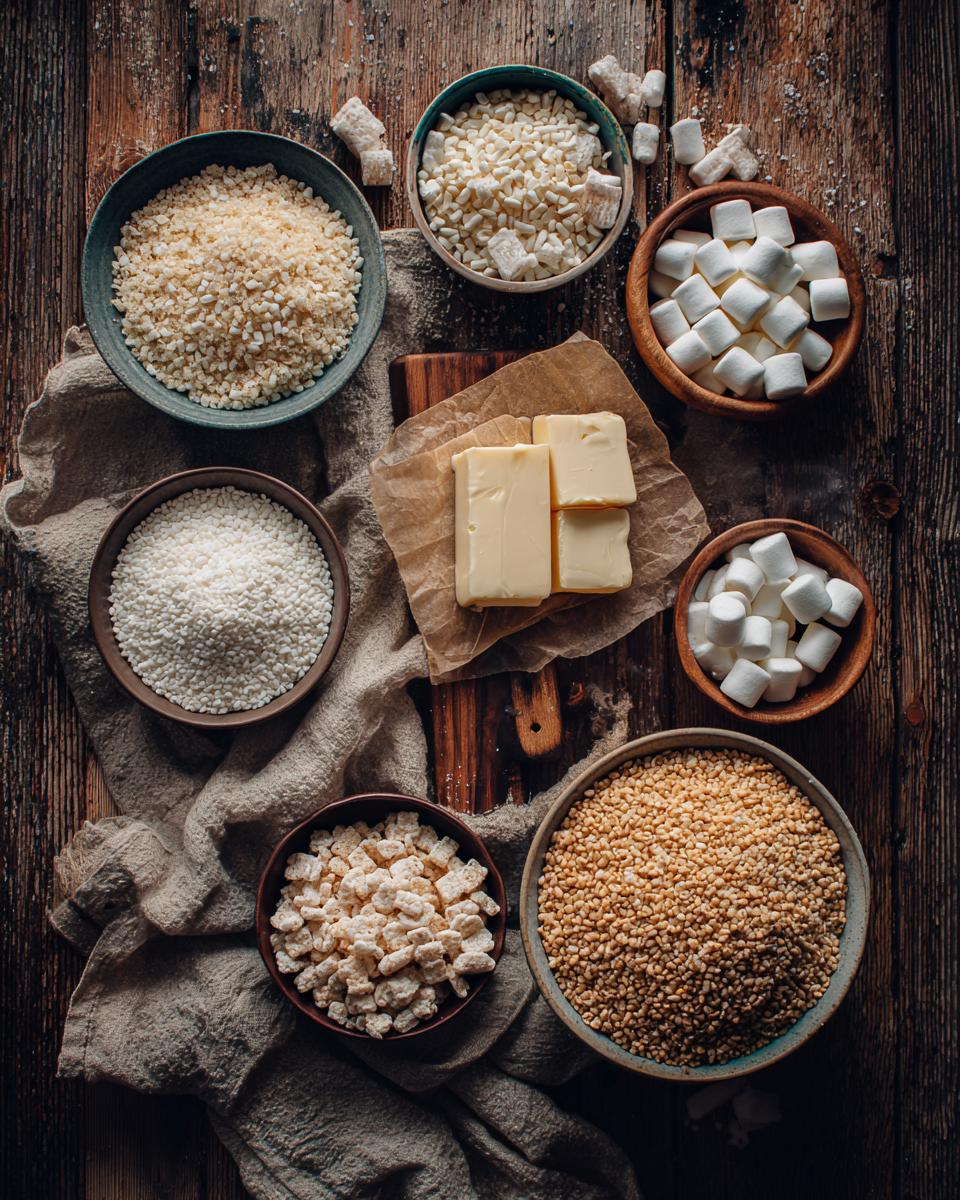
Marshmallow Rice Krispies Ingredients
Here’s the beautiful simplicity of it – just three ingredients stand between you and that perfect crispy-chewy treat we all crave. But listen closely, because each one plays a special role in creating that nostalgic magic we love so much.
- 3 tablespoons unsalted butter – This isn’t the time to skimp! Real butter gives that rich, caramel-like flavor that makes these treats irresistible. I’ve tried margarine in a pinch before (don’t tell Grandma), and it just doesn’t coat the cereal with the same velvety perfection.
- 4 cups fresh mini marshmallows – Fresh is key here – that bag that’s been sitting in your pantry since last Halloween won’t melt properly. The mini ones dissolve faster and more evenly than the big guys. Pro tip: measure these by gently packing them into your measuring cup – no need to smash them down!
- 6 cups crispy rice cereal – The namesake ingredient! That signature “snap, crackle, pop” texture comes from using a good quality rice cereal. And yes, it must be the plain original variety – no frosted or flavored versions unless you’re feeling adventurous (we’ll talk variations later!).
See what I mean about simple? But here’s the thing – these humble ingredients transform into something magical when combined just right. Next, we’ll talk about the tools you’ll need to make the magic happen!
Equipment You’ll Need for Marshmallow Rice Krispies
Okay, let’s talk tools! One of the best things about these treats is that you don’t need any fancy equipment – just a few basic kitchen staples that you probably already have. Here’s what’s coming in clutch when you’re making Marshmallow Rice Krispies:
- A large pot – And I mean large. That cereal needs room to dance in the marshmallow mixture without overflowing. My trusty 4-quart Dutch oven is perfect – anything smaller and you’ll be scraping sticky cereal off your stovetop (been there!).
- Wooden spoon – Silicone works too, but there’s something nostalgic about using a wooden spoon just like Grandma did. The long handle keeps your hands safe from the heat, and that flat edge is perfect for scraping every last bit of marshmallow goodness from the pot.
- Greased 9×13-inch baking dish – Pro tip: rub a little butter on a paper towel and wipe it all over the inside. That satisfying “shhhhk” sound when you press in the mixture? Music to any Rice Krispie treat maker’s ears.
- Measuring cups – Nothing fancy needed here, but do yourself a favor and use liquid measuring cups for the marshmallows (they pour easier) and dry for the cereal. My old plastic set from college still does the trick!
That’s really it! No mixers, no special pans – just good old-fashioned tools that let the simple ingredients shine. Now that we’ve got our gear ready, let’s get to the fun part – making the magic happen!
How to Make Marshmallow Rice Krispies
Alright, let’s get to the good stuff – turning those simple ingredients into that perfect crispy-chewy treat we all love. Follow these steps carefully, and you’ll be biting into homemade Marshmallow Rice Krispies before you know it!
1. Melt the butter slowly
Start by melting your butter in that large pot over low heat – I mean it when I say low! You want gentle bubbles, not a raging boil. This should take about 2 minutes. The butter should be completely liquid but not browning at all – we’re not making cookies here!
2. Add marshmallows and stir constantly
Now pour in those fresh mini marshmallows. Here’s where the magic starts! Keep stirring with your wooden spoon – I do small figure-eight motions to make sure nothing sticks to the bottom. This takes about 3-4 minutes total. You’ll know it’s ready when you’ve got a smooth, glossy lava-like consistency with no lumps. (Resist the urge to taste test – that molten sugar is HOT!)
3. Remove from heat and add cereal
Turn off the burner and immediately dump in all your crispy rice cereal. Working quickly but gently, fold the cereal into the marshmallow mixture until every single piece is coated. I like to use a folding motion rather than stirring – this keeps the cereal from getting crushed. This should take about 1 minute max.
4. Press firmly into your prepared pan
Quickly transfer the mixture to your greased baking dish. Here’s my secret trick: lightly grease your hands with butter or cooking spray and press the mixture firmly into every corner. You want even pressure – not so hard that you crush the cereal, but enough that everything sticks together nicely. This takes about 30 seconds of focused pressing.
5. Let cool completely before cutting
Now the hardest part – waiting! Let your treats cool at room temperature for at least 30 minutes (I know, torture). They’ll firm up perfectly for clean cuts. Use a sharp knife and wipe it between cuts for perfect squares. Pro tip: for extra clean edges, chill in the fridge for 15 minutes first!

See? Easy as can be! Now you’ve got a whole pan of that nostalgic goodness ready to enjoy. Just try not to eat them all in one sitting – though I won’t judge if you do!
Tips for Perfect Marshmallow Rice Krispies
After making enough batches of these to fill a swimming pool (okay, maybe just my kids’ lunchboxes for a year), I’ve learned all the tricks for Marshmallow Rice Krispies that stay perfectly chewy and never disappoint. Here’s what Grandma never wrote down but totally should have:
Grease everything that touches the marshmallow
I’m not kidding when I say you should grease your hands, the spoon, the spatula – anything that’s going to come into contact with that sticky marshmallow mixture. A light coating of butter or non-stick spray makes all the difference between “easy to handle” and “why is this stuck to my elbows?” Trust me, I’ve had both experiences!
The parchment paper game-changer
For picture-perfect squares every time, line your pan with parchment paper before greasing. Leave some overhang on the sides, and when your treats are set, you can lift the whole block out in one piece for effortless cutting. No more wrestling with the pan or broken corners!
Storage secrets for lasting freshness
That airtight container note in the recipe? Non-negotiable. But here’s my extra tip – place a piece of parchment between layers if you’re stacking them. And if you want them to stay ultra-fresh beyond the usual 3 days (who are we kidding, they never last that long), you can freeze them for up to a month! Just thaw at room temperature when the craving hits.
Temperature matters more than you think
If your treats turned out rock hard last time, you probably overcooked the marshmallows. Keep that heat low and slow! And if they’re too soft, try pressing them into a slightly smaller pan – the extra thickness helps them hold their shape better. My Goldilocks zone? When the marshmallow mixture just starts to pull away from the sides of the pot.
Remember, even “mistakes” taste amazing – my first batch was basically one giant Rice Krispie brick, and we still ate every crumb with spoons. But with these tips, you’ll nail it on the first try!
Marshmallow Rice Krispies Variations
Once you’ve mastered the classic version, it’s time to get creative! These simple twists can take your Marshmallow Rice Krispies from nostalgic to next-level. Here are my favorite ways to mix things up:
Chocolate Drizzle Delight
Melt some chocolate chips (milk, dark, or white – your call!) and drizzle it over the cooled treats. I like to use a zip-top bag with a tiny corner snipped off for perfect lines. Sprinkle with sea salt for that sweet-and-salty combo that’ll have everyone asking for seconds.
Festive Sprinkle Fun
Add a pop of color by mixing in a handful of rainbow sprinkles right after you add the cereal. Or, press extra sprinkles into the top before it sets. Perfect for birthdays, holidays, or just because – because who doesn’t love a little sparkle in their snack?
Peanut Butter Swirl Magic
For all my peanut butter lovers out there, this one’s for you. Melt a couple tablespoons of creamy peanut butter and swirl it into the marshmallow mixture before adding the cereal. The result? A gooey, nutty twist that’s dangerously addictive. Trust me, you’ll want to make a double batch!
The beauty of these variations? They’re all super simple but feel totally special. Whether you stick with the classic or try something new, there’s no wrong way to enjoy Marshmallow Rice Krispies. Go wild and make them your own!
Serving and Storing Marshmallow Rice Krispies
Now that you’ve made your perfect batch of Marshmallow Rice Krispies, let’s talk about keeping them fresh and serving them like a pro. These treats are best enjoyed at room temperature – that’s when you get that ideal balance of crispiness and chewiness. Here’s how I keep mine tasting just-made for days (if they last that long!):
Room Temperature Storage
Once completely cooled, store your treats in an airtight container with a tight-fitting lid. I’m partial to my vintage cookie tin – it keeps them fresh while adding to that nostalgic vibe. They’ll stay perfect for 3 days this way, though in my house they rarely make it past day two! Pro tip: layer them between sheets of parchment paper if you’re stacking them to prevent sticking.
Freezer-Friendly Option
Did you go a little overboard with the batch size? (No judgment – I do it every time!) These actually freeze beautifully. Wrap individual squares tightly in plastic wrap, then pop them in a freezer bag. They’ll keep for up to a month this way. When the craving hits, just let them thaw at room temperature for about 15 minutes – no reheating needed. The texture stays perfect!
Serving Suggestions
While these are delicious all on their own, I love getting creative with presentation. For parties, I cut them into fun shapes with cookie cutters – stars for the 4th of July, hearts for Valentine’s Day. Or stack them in a pyramid on a cake stand for a casual dessert table centerpiece. My kids love when I pack them in their lunches with a little note tucked underneath – it’s our version of a love letter!
One last tip: if you’re taking these to a potluck or picnic, pack them in single layers separated by parchment. That way they won’t stick together in transit. Now go enjoy those perfect homemade treats – you’ve earned it!
Marshmallow Rice Krispies FAQs
Over the years, I’ve gotten every question imaginable about these treats (and made every mistake possible while figuring out the answers!). Here are the ones that come up most often – consider this your troubleshooting guide for Marshmallow Rice Krispies perfection!
Can I use regular marshmallows instead of minis?
Absolutely! Just chop them into smaller pieces first – about quarter-sized chunks work best. The minis melt faster and more evenly, but regular marshmallows will get you there with a little extra stirring. Pro tip: spray your scissors with cooking spray before cutting to prevent sticking!
Why did my treats turn out rock hard?
Oh honey, I’ve been there! This usually happens when the butter gets too hot before adding marshmallows, or when you cook the marshmallow mixture too long. Remember – low and slow is the way to go. If your butter starts bubbling vigorously before adding marshmallows, take the pot off the heat for a minute to cool slightly.
Can I double this recipe?
Yes! But you’ll need a much bigger pot – I recommend at least a 6-quart size. The marshmallows expand dramatically when melting, and you need room to stir in all that extra cereal. Also, press the mixture into two pans rather than one giant batch – it’ll set better this way. My record is a triple batch for a school bake sale – let’s just say it required some creative stirring!
Remember, even “failed” batches usually still taste amazing. My first attempt at doubling the recipe ended up as Marshmallow Rice Krispies “bites” because I couldn’t press them properly – and you know what? The kids devoured them anyway!
Nutritional Information for Marshmallow Rice Krispies
Let’s be real – we’re not eating these for the health benefits, but it’s always good to know what you’re enjoying! Keep in mind these numbers are estimates – your exact count might vary depending on your specific ingredients (especially if you went heavy on that chocolate drizzle we talked about earlier!). Here’s the scoop per serving (about one 2″ square):
- 120 calories – Perfect for when you need just a little sweet pick-me-up
- 22g carbohydrates – That crispy, carby goodness we all love
- 10g sugar – Mostly from the marshmallows (worth every sticky bite!)
- 3g fat – Thank that glorious butter for the rich flavor
- 1g protein – Okay, not a protein bar, but every gram counts, right?
Now, here’s my two cents: these treats are all about joy and nostalgia, not macros. I don’t count calories when I’m biting into that perfect crispy-chewy texture that takes me back to simpler times. But if you’re keeping an eye on things, knowing the numbers helps you enjoy them even more – maybe with an extra square when no one’s looking!
Print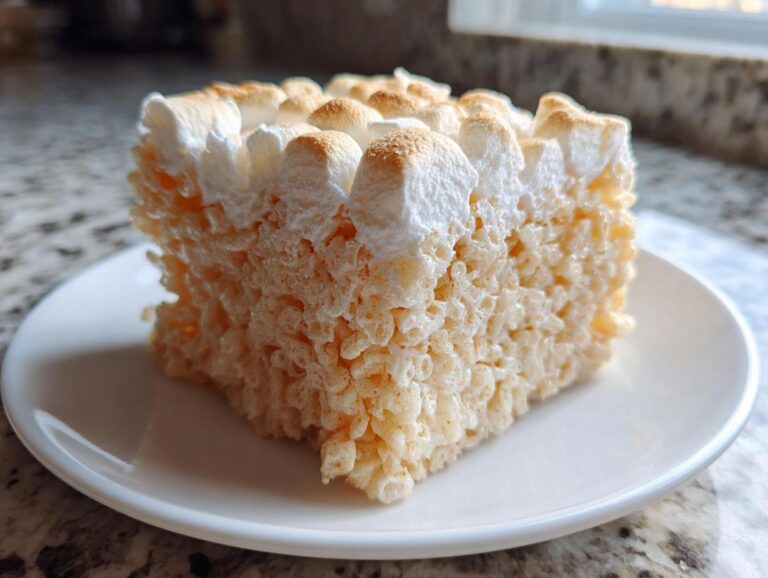
Marshmallow Rice Krispies Treats
A simple and delicious treat made with crispy rice cereal and marshmallows.
- Total Time: 10 mins
- Yield: 12 squares 1x
Ingredients
- 3 tbsp butter
- 4 cups mini marshmallows
- 6 cups crispy rice cereal
Instructions
- Melt butter in a large pot over low heat.
- Add marshmallows and stir until fully melted.
- Remove from heat and stir in crispy rice cereal.
- Press mixture into a greased baking dish.
- Let cool completely before cutting into squares.
Notes
- Use fresh marshmallows for best results.
- Grease your hands lightly when pressing the mixture.
- Store in an airtight container.
- Prep Time: 5 mins
- Cook Time: 5 mins
- Category: Dessert
- Method: Stovetop
- Cuisine: American
- Diet: Vegetarian
Nutrition
- Serving Size: 1 square
- Calories: 120
- Sugar: 10g
- Sodium: 80mg
- Fat: 3g
- Saturated Fat: 2g
- Unsaturated Fat: 1g
- Trans Fat: 0g
- Carbohydrates: 22g
- Fiber: 0g
- Protein: 1g
- Cholesterol: 5mg